Showing posts with label Ink Blending. Show all posts

Sunday, February 5, 2017

My Favorite Things Sketch Challenge #318

Hello, and happy Sunday!

I was able to get together with my crafty gals this weekend, and created a little card for the latest MFT sketch!


I just love that hanging cat from the I Knead You stamp set. It's adorable! I decided to have him (or her) hanging from behind the sentiment strip. I began by stamping the cat image, and colored it. I then masked it and blended in Picked Raspberry Distress Ink. 


I removed the mask, and added a piece of black woodgrain paper, that I white heat embossed a portion of the original sentiment onto. I took two strips of striped patterned paper, and adhered those to a white card base. I then adhered the panel to my card with foam tape.


As a last touch, I adhered a few sequins from Pretty Pink Posh. Thank you so much for stopping by! Have a great weekend!


Thursday, August 11, 2016

Share Joy Challenge #48

Hello!

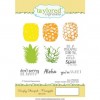
I have the latest Share Joy Challenge to bring to you, today! I used the fun sketch for this one, along with the Simply Stamped - Pineapples stamp set, and dies. As I write this, it's 90 degrees, and hot, hot, hot! That pineapple looks good enough to eat! 


To begin this card, I took my frame and marked the inside edges. I then masked off the edges, and erased the pencil marks. I brought in a combination of Distress Ink to create a very tropical background. I set that aside, and began stamping my pineapple.


For the pineapple, I used several dye inks to layer up the image. Once it was stamped, I die cut both the top and the bottom out, and placed it onto my card front to see where to draw lines with my black multi-liners. I adhered the frame with foam tape, stamped my sentiment, and adhered the pineapple, along with a few black sequins.

Details on how to play along with us this week are below! I can't wait to see what you make!


Challenge Format:

Each week we will be bring you two types of challenges that you can use separately or together to inspire your creativity. One of the challenges will always be a sketch. The other challenge will vary each week. It's up to you if you want to use just one of the challenge components or both together. New challenges will be posted each Thursday.

To enter the challenge, simply follow these instructions:

  1. Create a new card or project using either or both components of the challenge posted above. Use of Taylored Expressions products is optional.
  2. Post your project on your personal blog or online gallery. Please directly link to the Share Joy Challenge blog in your post. 
  3. Add a direct link to your project using the InLinkz below. 
  4. Send or give your card to a friend, loved one, or someone who could use some joy! 
  5. Leave a comment on this post telling us who you sent your card to and why. Don't forget this one!! We LOVE hearing from you!!
Prizes:
  1. A winner will be chosen at random each week to receive a $15 Taylored Expressions Gift Certificate. Winning entries that use TE products will receive a $20 Taylored Expressions Gift Certificate.
  2. Each month, we will award a Grand Prize to a TE Share Joy Challenge participant. The more you play throughout the month, the better your chance to win!
  3. Weekly winners will be announced at the time of the new challenge launch each Thursday.
Stay connected with the TE Share Joy Challenge! Subscribe to receive updates, news, and new challenge details in your Inbox:


Thursday, July 7, 2016

Share Joy Challenge #43

Hello!

I have this week's Share Joy Challenge to share with you, today! Whenever there is the option for Tic-Tac-Toe, I feel the need to do it. I don't know why, but there it is. I went with the top row, going to the right, check it out...


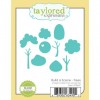
I knew I wanted to use the Build-a-Scene - Trees die set, but noticed the actual tree top shape was smaller than I needed it to be for a good shaker window, so, I simply die cut it three times to form a larger opening. I added some blue Distress Ink around the edges, and adhered the Stitched Scallop piece that I had die cut from Peapod Card Stock to the bottom of the panel. I tied some twine around it, and then added a piece of acetate, and foam tape to my shaker window.  


I sprinkled in some sequins, and stars, and covered it with more acetate before adhering the whole panel to a white card base with more foam tape. I had also stamped my sentiment earlier in the process, when it was flat on my desk. All of the supplies I used are listed below!

I hope you've enjoyed, and are inspired to play along with us this week! Have a good one, friends!

Challenge Format:

Each week we will be bring you two types of challenges that you can use separately or together to inspire your creativity. One of the challenges will always be a sketch. The other challenge will vary each week. It's up to you if you want to use just one of the challenge components or both together. New challenges will be posted each Thursday.

To enter the challenge, simply follow these instructions:

  1. Create a new card or project using either or both components of the challenge posted above. Use of Taylored Expressions products is optional.
  2. Post your project on your personal blog or online gallery. Please directly link to the Share Joy Challenge blog in your post. 
  3. Add a direct link to your project using the InLinkz below. 
  4. Send or give your card to a friend, loved one, or someone who could use some joy! 
  5. Leave a comment on this post telling us who you sent your card to and why. Don't forget this one!! We LOVE hearing from you!!
Prizes:
  1. A winner will be chosen at random each week to receive a $15 Taylored Expressions Gift Certificate. Winning entries that use TE products will receive a $20 Taylored Expressions Gift Certificate.
  2. Each month, we will award a Grand Prize to a TE Share Joy Challenge participant. The more you play throughout the month, the better your chance to win!
  3. Weekly winners will be announced at the time of the new challenge launch each Thursday.


Thursday, June 23, 2016

Share Joy Challenge #41

Hello friends!

Summer is in full swing here, and to be honest, paper crafting has taken a bit of a back seat. When the weather is nice, I love being outside! Today, I am bringing you this week's Share Joy Challenge! I used the sketch, along with the super cute pineapples from the Simply Stamped: Pineapples set.


I started by die cutting the largest frame from the Frame In Frame 2 set, using white card stock. I then made little marks on my card base, so I knew where my frame would sit, and inked up within those boundary lines. I then adhered the frame with foam tape. 


I stamped the pineapple using a Stamp-a-ma-jig, and various inks. Here is what I used. Sorry it's turned! The TE inks are so vibrant, and fun to stamp with, I highly recommend them!


After I stamped the pineapple, I adhered it to my card front using foam adhesive, along with a twine bow underneath it.


To finish my card, I stamped the sentiment and adhered a few sequins, along with a bit of shimmer to the leaves with Wink of Stella.

Here is a look at the graphic, and I have added the info below! I hope you decide to play along with us this week!

Challenge Format:

Each week we will be bring you two types of challenges that you can use separately or together to inspire your creativity. One of the challenges will always be a sketch. The other challenge will vary each week. It's up to you if you want to use just one of the challenge components or both together. New challenges will be posted each Thursday.

To enter the challenge, simply follow these instructions:

  1. Create a new card or project using either or both components of the challenge posted above. Use of Taylored Expressions products is optional.
  2. Post your project on your personal blog or online gallery. Please directly link to the Share Joy Challenge blog in your post. 
  3. Add a direct link to your project using the InLinkz below. 
  4. Send or give your card to a friend, loved one, or someone who could use some joy! 
  5. Leave a comment on this post telling us who you sent your card to and why. Don't forget this one!! We LOVE hearing from you!!
Prizes:
  1. A winner will be chosen at random each week to receive a $15 Taylored Expressions Gift Certificate. Winning entries that use TE products will receive a $20 Taylored Expressions Gift Certificate.
  2. Each month, we will award a Grand Prize to a TE Share Joy Challenge participant. The more you play throughout the month, the better your chance to win!
  3. Weekly winners will be announced at the time of the new challenge launch each Thursday.


Wednesday, June 22, 2016

Sweet Stamp Shop

Hello!

So, I have been trying to write this post for what seems like forever, and I finally got it up. I know some of you are aware that I have designed for Sweet Stamp Shop in the past, and I am happy to say I am a contributor for them again. This time around, I will be sharing projects here and there that uses newly released stamps. 

This months release was really good, and I created a couple cards using a set or two. Let me share...


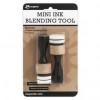
I used the fun Bubble Alpha set for this bright card! I started by stamping, and clear embossing a few sequins stamps from the Craft Night set onto a piece of card stock. I then applied a generous amount of yellow ink with a sponge dauber, and ink blending tool.


I stamped the letters for hello onto white card stock, and colored them in an ombre fashion with Copic Markers. I cut each on out, and adhered them to my panel with foam. I then adhered the panel to a black card base.


The next set I used is the adorable, Peek-A-Boo Cats, and colored and cut out two of them. I added a gradient of ink onto a white card base, that had been masked using painters tape. Once I removed the tape, I adhered the cats.


To finish it, I added my sentiment, and a few clear sequins. Super simple, and full of fun! I hope you'll check out the latest stamps from Sweet Stamp Shop. If you are into planner stamps, they have a plethora of sets perfect for making even your most mundane tasks, fun!

Thanks so much for stopping by today! I hope to share a couple more with you soon. I will be back tomorrow with a new Share Joy Challenge, so I hope you'll return then.


Friday, June 17, 2016

A Memory Box Post

Hey!

So glad you stopped by! I have a colorful, ink blended card up on the Memory Box blog, and would love it if you wandered over there to check it out! I used a few fabulous products from the last release to create it, and hope it's colorful, and simple technique inspires you to try it.


Thanks so much for dropping by, have a great weekend!


Friday, April 8, 2016

A Memory Box Blog Post

Hello, my crafty friends!

Thanks for stopping by today! It. Is. Friday! WAHOO! This week, Memory Box is having their Blog Blitz, showing projects using their newest release. I wanted to give you a little looksie at what I created using a few new dies. 


I hope you'll stop over to the blog, and get the details of what I used, and how I created it. Thank you so much for joining me here! Have a great day.


Wednesday, March 23, 2016

A Butterfly Reflections, Ink Post

Hey there, friends!

I wanted to stop by and direct you over to the Butterfly Reflections, Ink blog, because I am sharing this bold Happy birthday card! You can stop over there for all of the details! 


Thanks so much for visiting me today!


Sunday, November 15, 2015

Happy Holidays - MFT Card Challenge #254

Hey there!

How is your weekend going? I am knee deep on selling my home, with open houses, showings, and endless cleaning!! Oh my! With all the crazy, I did get to spend some time at my craft table, and boy did I need it. So, I chose to play along with the latest MFT card challenge. It's a great sketch!


I turned the sketch upside down, and did a little ink blending, and die cutting!


I started with a white card base, and masked off portions of the bottom of the card, blending in some fun Christmas colors. I used Distress Inks, and a blending tool to get the fad on the top portion of each color.


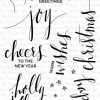
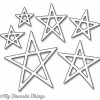
I then took the fabulous Lucky Star dies, and stacked them up to create a thicker die cut. I added a star cut from glitter cardstock, and adhered it on top of each star. I added a frame, popped up with foam adhesive, and then stamped a sentiment from Hand Lettered Holiday in Onyx Black ink.

Thanks so much for stopping by today! I hope you have a great one!


SITE DESIGN BY DESIGNER BLOGS