So, during my crafty time last night, I played around with Lifestyle Craft's Nesting Star Dies. I came up with two easy, CAS projects.


For this, I die cut a large star from a Studio Calico 6x6 paper pad, then die cut a smaller star out of the center. I popped up the star on my card base, and stamped my sentiment in the die cut center. Last, I added a bit of red twine.
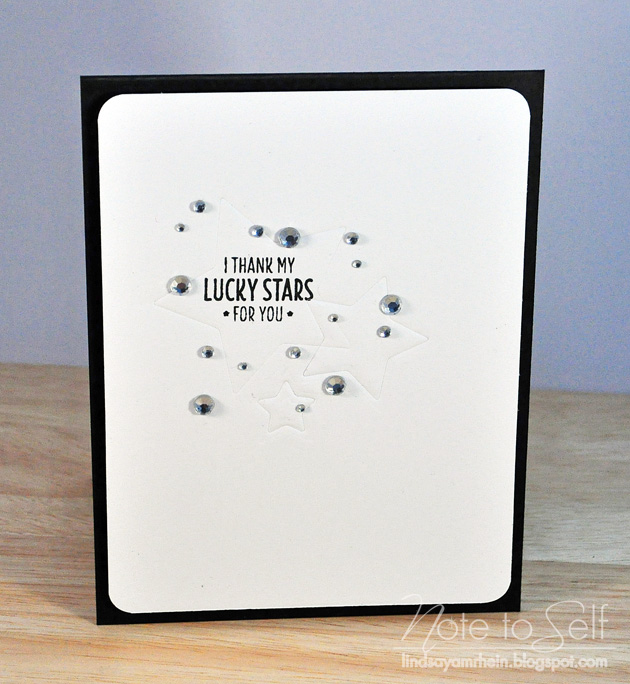

For the next card, instead of die cutting out the star, I impressed it into the white panel. I know it's kinda hard to see. Taking three smaller sized stars, I simply added an embossing mat underneath the cardstock, removed one tab on my multipurpose platform and kept the same sandwhich. I then went a little crazy with the rhinestones, love me some bling!
I have been trying out my new light tent recently and adjusting the settings on my camera, but I just can't seem to get the right mix of light and shadow. Any tips you might be able to offer? I think I might just lose my mind from bad photos, lol! Thanks for any help!
BTW, to get your hands on these dies, check out the Lifestyle Crafts store and enter NOTETOSELF at checkout to score 20% off!
Thanks so much for stopping by! Have a great day!

Supplies-
{Red Patterned Paper Star}
Paper: Marshmallow Bazzill
Patterned Paper: Studio Calico
Stamps: Darling Sentiments Hero Arts/Studio Calico
Ink: Cherry AMuse Studio
Embellishment: Twine Whisker Graphics
Tools: Nesting Star Dies Lifestyle Crafts
{Rhinestone Stars}
Paper: Licorice, Marshmallow Bazzill
Stamps: Darling Sentiments Hero Arts/ Studio Calico
Ink: Onyx Black Versafine Tsukineko
Embellishment: Clear Rhinestones Michaels
Tools: Nesting Star Dies Lifestyle Crafts


LOVE your cards! Stars are so fun!
ReplyDeleteI feel your pain with getting the right light and shadows in your photos. Sorry, I can't help, I need help myself. ;)