Friday, January 31, 2014

CAS127: Over The Edge

Hello crafty friends!

It's Friday!  Wahoo!  With that I bring you a new challenge at Cas-ual Fridays!  This week is all about hanging over the edge of your card base.


For this, I die cut a Paper Smooches die multiple times, and layered it on top of a panel, partially die cut with that same die.  


I then took Botanicals 1 and 2 and stamped a mix of images in white pigment and then again over it with a green dye ink.  I then stamped the flowers and added a few small pearls.


Do play along with us, Cas-ual Friday Stamps is our awesome sponsor and there is a fun prize up for grabs!  Catch you later crafty friends.


Wednesday, January 29, 2014

Miss You

Hey there!

Today is one of those days where time is conspiring against me!  I wanted to share this card with you, made for the i {heart} papers store.  Ohhh, have you been by?  Kate is adding gobs of new goodies that were shown at CHA!  I can't wait to get a "few" things myself.  ;0)


For my card, I broke out a fun paper pad from Carte Bella, and white heat embossed a cluster of leaves and flowers from Paper Smooches Botanical 2 set.  Love, love, love this set!


I then took the "miss you" phrase from, again, Paper Smooches...this time from the drool worthy set, Scripty Sayings, and heat embossed it onto vellum with gold powder.  I then trimmed it out, and adhered it over my flower cluster.  As a finishing touch, I added a bunch of sequins!

Thanks so much for joining me today!  I hope you'll stop on over to the i {heart} papers store to see all of the new goodies!

Friday, January 24, 2014

Sweet Stamp Shop post

Hello!

I am up today, on the Sweet Stamp Shop blog!  Just in case you didn't get a chance to hop on over there, I thought I would bring it to you here.  I talk about finding inspiration, and today is no exception.  Head on over there to see what I used as a jumping off for my card.


The card I chose for my inspiration had a gradient glitter star.  I chose to do a heart, cut from Wplus9's Heart Stacker die set, and used four different pink glitters.  I popped it up with foam, and added a vellum strip, heat embossed using Kiss from the Kiss Me set.


I stamped the small heart from the set, using HA Gold ink, and then added sequins from the Pretty Pink Posh shop.  I had a black border, and adhered the panel to a pink card base.

Thanks for stopping by today!  Be sure to head over to the Sweet blog to see more!


Thursday, January 23, 2014

Thanks A Bunch

Hey friends, it almost Friday!  Wahoo!

I am playing along with the Runway Inspired challenge this week, with this fun little number.  Check out the inspo...


Lots of fun colors on this one!  I have been meaning to ink up the fabulous Thanks A Bunch set from Avery Elle, but never have.  I waited too long because the i {heart} papers store is currently out of it, sorry I can't link it.  Love this set though, it is so fun.  I love that flower bunch and the sweet sentiments. 


I took the flower cluster meant for the bouquet and stamped it in colors found in the pic, onto a white card base using HA inks.  I then took the Avery's Alphas dies, and created a panel to pop up over the floral arrangement.  I have always wanted to try this technique, and think it is really fun!


Before adhering my panel, though, I selectively inked "a bunch" from the Thanks A Bunch set, in black ink, and added color coordinating enamel dots.


Thank you for joining me today!  I will be back tomorrow with another fun project!


Monday, January 20, 2014

Sending Lots of Love

Hey friends!

Today, I am stopping by to share a card using a bunch of fabulous Wplus9 products from the i {heart} papers store.  I played along with the latest Monday Mood Board over at the Wplus9 blog.  Here is a look at the mood board.


To start, I took a white panel, and inked it up in a yellow gradient, using Hero Arts Shadow Inks, and a dauber.  I then spritzed it with gold, and white spray inks, and let it dry.


I then took the Quilt Cuts dies (both) and, using two different frames, heat embossed them in gold detail powder and layered them on top of each other..  I stamped the floral spray from the Valentine Wishes set in Silver HA ink, and attached the panel to my white card base, at an angle.


Lastly, I stamped the large sentiment from the same set using Versamark, and heat embossed it in Pewter embossing powder.  I then trimmed it out and glued it onto the top of my frames.  As a last detail, I added a few sequins.


Thanks so much for visiting me!  You know I love it when you do.


Friday, January 17, 2014

CFC126: Color Blocks

Happy Friday friends!

This has certainly been a busy week on the blog!  Thanks for hanging in there with me.  It is time for another CAS-ual Fridays challenge, and this week it is all about color blocking!  


Use blocks of color on your CAS creation
*2 week challenge*
Use your own stash
prize sponsored by CFS


For my card, I chose some fun Mama Elephant stamps from the Studio Calico kit, called Blue Note.  I adhered some grid pattern paper to my card base, and stamped my sentiment.  I then cut strips of colored cardstock, stamping my sentiment on those and layered them over the original.  


Lastly, I added some fabulous flat sequins from Pretty Pink Posh, glittered up the word Love, and stamped the arrows.  I hope you play along this week, there is a fun prize up for grabs from CAS-ual Fridays Stamps!


Thursday, January 16, 2014

Sweet Stamp Shop January Release

Hi there!

I have some projects to share using the latest and greatest from the Sweet Stamp Shop.  Super fun, and super cute.  You can find them here!


For my first card, using Just the Basics, I masked off the card front with a piece of masking paper that I had die cut a heart from.  I then stamped my main sentiment in red, and around it, added supporting sentiments in gray.  I then sponged in some red ink, and added a few enamel dots.


This next card, I used the adorable set, Foxy.  Instead of focusing on the cutie fox, I stamped the speech bubble, as well as the hearts onto a rustic card panel.  I then adhered it to a card base already prepped with patterned paper and vellum.  Enamel dots finished it off!


For this card, I did a bit of simple stamping, using Anatomy of Love, just the man and woman, as well as the outlined heart.  I added the plus and equal sign with a pen, and glossy accented the colored in heart.  I then took my yellow ink pad, and made some rough inking around the panel edges.  Lastly, I adhered it to a Kraft card base.


For my last card, I used Numbers.  Who couldn't use a numbers set?  I began by stamping and white heat embossing a bunch of the numbers randomly on the front of a white panel.  I then sprayed the panel with Mr. Huey's, allowing it to dry.  I then adhered it to a black panel, popped it up onto a white card base, and added a strip stamped with my Happy Birthday greeting from Just The Basics.  Of course, I finished it off with enamel dots.  Seriously, take them from me!  lol, no don't!  I love them too much!

Thank you sooo much for joining me today!  I hope you were inspired, please go check out the sets in their entirety on the SSS blog.  


Wednesday, January 15, 2014

Cup Cards To Go February Kit

Hey there!

I have a bunch of fun projects to share with you today that were made from the February Cup Cards To Go kit, Admirer.  Have I mentioned how much fun this kit is?  It is packed with goodness from Doodlebug, Crate Paper, Jillibean Soup, and more!  Ready for some projects?


This one features the Embellishment Kit, that includes the die cut, layered heart, along with the sentiment stickers.


This also includes stickers from the exclusive Embellishment kit.  I used the brads, as well as the washi tape that is included in the main kit, Admirer.


I die cut my own tag, and added a bit of twine that came with a tag from the kit.

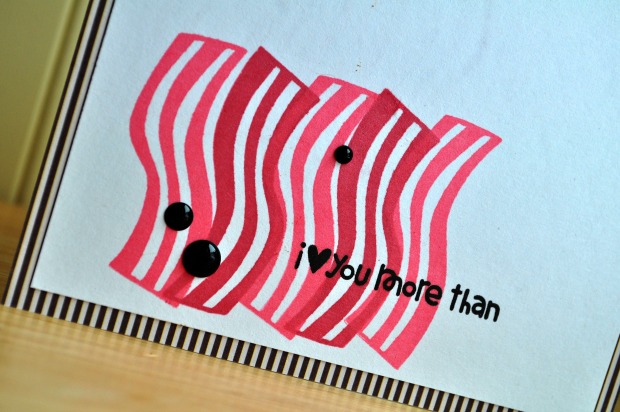
I used a couple of the die cuts, as well as stickers and fabric tape for this card.  I loved the patterned paper, and added a bit of pizzaz to the front with some white flecks of paint.


For this, again more paint, and those lovely stickers from Crate Paper.  I die cut a fun heart border from Paper Smooches to anchor my heart stickers, and simply added the pearls as well as the sentiment sticker.


For this little card, I wanted to create a pocket for the tickets that were included. I took patterned paper, and adhered it with my Tiny Attacher, and a bit of the ric rac that comes with the kit.  I then decided this cutie needed an envelope, and used the fun 6x6 vellum sheet.  Using my envelope punch board, it had the perfect size.  Cute huh?


Well, you made it through!  Now, run, don't walk over to Cup Cards and get yourself one of these.  Thank you so much for popping by!


Tuesday, January 14, 2014

Bacon!

Hey friends!

I am back to share a little card I made using products from the i (heart) papers store.  I know the Calorie Free set from Paper Smooches has been out for awhile, but I finally got myself the set, and had to make something with that bacon stamp!  


To start, I took a piece of patterned paper from the 6x6 Dear Lizzy pad, Polka Dot Party, and adhered it to a white card base.  I then took a white panel, and stamped the bacon strips, rotating every other using Hero Arts Pale Tomato, and Red Royal.


So, funny thing is, as I was about to stamp my sentiment, I dropped my block onto my panel.  I thought, no biggie, I will flip it over.  Well, it wasn't until I was done, had stamped the sentiment and added the enamel dots, that my son noticed it looked like the bacon was smoking.  What?  Yes, I guess it kinda does kiddo.  Oh well, I think I like it, what do you think?  hahaha!

By the way, I have a fun stampy, die cut, love card up on the i {heart} papers blog today.  I would love for you to check it out!  Here is a little peek, or whole peek.  ;0)


Thanks so much for stopping by today!  Have a great day!


Sunday, January 12, 2014

Hello

Hello!

How is your Sunday going?  I am trying to soak in the weekend as much as I can!  That includes making cards, dotchaknow.


Awhile ago I ordered this awesome woodblock stamp from Hero Arts called Tiny Flags, along with the Hello dies from MFT.  Gah!  Love them both, they are so fun!  I stamped and heat embossed the triangles onto a white panel, and die cut the hello from the bottom of it.  I then die cut the hello again, and inserted it in the opening.


To finish it off, I added a few black sequins from Pretty Pink Posh.  Fun no?  That's it for me today, but I will be popping in again soon.  Have a great rest of your weekend, friend!


Saturday, January 11, 2014

Around Blog Land

Hello, hello!

I don't have anything new to share today, however, I wanted to stop by and share a link to my post over on the Sweet Stamp Shop blog.  Here is a little peek.  Hop on over to the blog to see how I was inspired!


Also, some fabulous sneaks were up at the CupCards To Go blog yesterday for this months glorious kit!  Here is a lovely collage of the projects I created using it.  Seriously, there is so much goodness in this kit!


I hope you are having a great weekend!  I will be back with more cards soon.  Thanks for stopping by!


SITE DESIGN BY DESIGNER BLOGS